
StarryAI for iOS
In digital art, AI-based tools are transforming the way creators conceive their projects.
One of the most popular apps in this category is StarryAI, a platform that allows users to generate unique images using advanced AI.
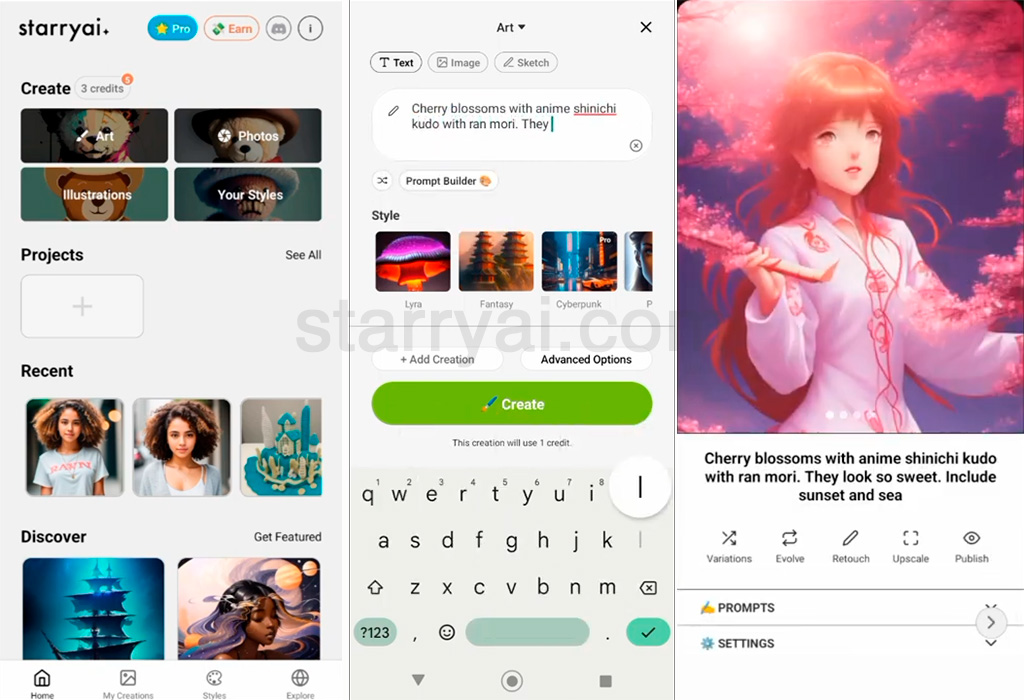
StarryAI is an innovative tool that uses artificial intelligence for the creation of images automatically generated from textual descriptions. You can input keywords or phrases, and the AI will interpret these entries to create a unique visual representation.
Whether you are a digital artist or simply someone interested in exploring AI's potential in art, this guide will provide you with all the tools you need to get started.
Download it today and be part of this incredible creative revolution!
What does StarryAI offer?
StarryAI offers a powerful and easy-to-use platform that allows users to generate artistic images using artificial intelligence.
Here are some important features when using StarryAI:
- Frequent updates: StarryAI constantly improves its algorithms and adds new features, ensuring that you are always working with the most advanced tools for image generation.
- High-resolution support: With the premium version, you can generate high-resolution images, ideal for professional projects or prints.
- Iteration control: StarryAI allows users to adjust the number of AI iterations, which can help refine details or generate a more elaborate image as desired.
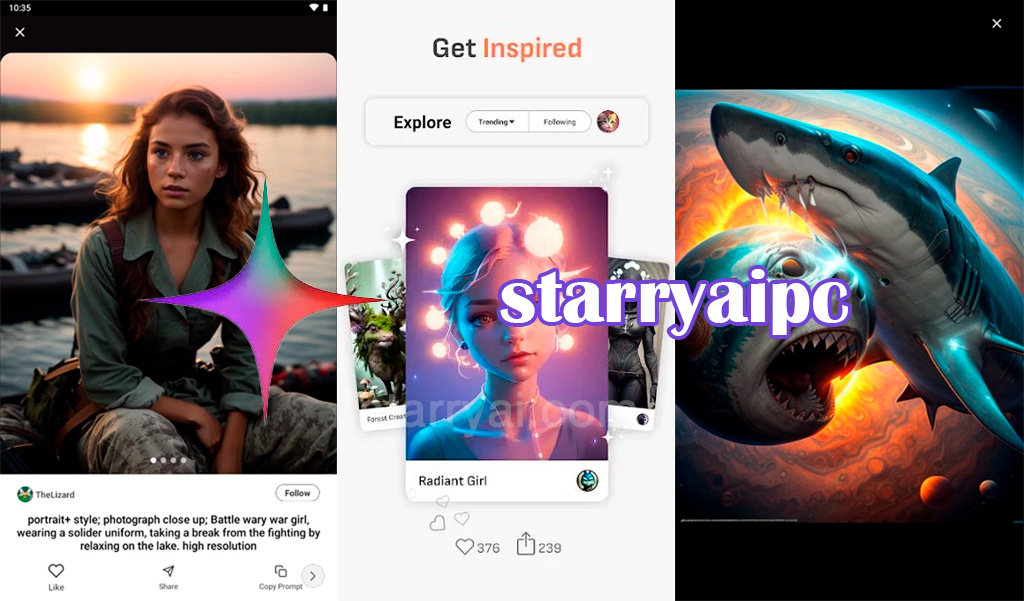
- Access to the community: The app includes a feature to interact with other creators and explore images generated by the community, allowing you to get inspired and learn from other users.
- NFT compatibility: StarryAI makes it easy to create images ready to be transformed into NFTs (non-fungible tokens), perfect for digital artists looking to venture into the world of certified digital art.
- Create AI portraits easily and quickly: Turn your photos into stunning portraits with our AI generator, capturing personality and emotion in each image. From abstract styles to realistic portraits, explore infinite possibilities and bring your ideas to life.
- Offline use: Although many features depend on being connected to the internet, StarryAI offers the option to save projects to continue working on them when offline.
Downloading and installing StarryAI on iOS
The first step to using StarryAI for iPhone or iPad is, of course, downloading the app from the App Store.
The download is completely free, though within the app you will find paid options for additional features.
Steps for downloading
- Open the App Store on your iOS device.
- In the search bar, type "StarryAI" and press search.
- Select the app from the results and press the download button.
- Once installed, open the app to start exploring its features.
An alternative to the official versions is the MOD version developed by third parties (Starryai Inc). This modification of the App, available for download via the second button you’ll see below, allows you to access all the Premium features for free.
Minimum device requirements
To ensure that StarryAI on iOS functions optimally, it is important to ensure your device meets the minimum technical requirements.
This is the basic set of requirements you must meet to install and use StarryAI on your iOS device.
| Requirement | Details |
|---|---|
| Operating System | iOS 14.0 or later |
| Compatibility | iPhone, iPad, and iPod touch |
| Storage Space | At least 150 MB of free space |
| Internet Connection | Required to generate and download images |
| User Account | Requires registration via email or Apple/Google account |
| Processor | Devices with A10 chip or higher |
On the other hand, if you prefer to access all the Premium advantages of the tool for free, you can download the modified (MOD) version of StarryAI through the following link:
While the free version of StarryAI for iOS offers a wide range of tools, the premium features provide even more control and creative possibilities. The benefits of the premium subscription include:
- More variations per description: Generate up to 10 different variations for each prompt.
- Higher resolutions: Ideal for projects requiring superior image quality.
- Access to exclusive styles: Enjoy unique art styles available only to premium users.
- Priority in generation: Images are created faster, saving time.
Can I use StarryAI on a Mac?
Currently, StarryAI is not available for direct installation on macOS devices via the Mac App Store.
Although some users with devices that have M1 or M2 chips may run iOS apps on macOS, this functionality does not extend to all apps, and StarryAI does not currently offer native support for macOS.
Alternatives for using StarryAI on Mac
However, if you want to use StarryAI on a Mac, there are alternative options.
Below is a detailed guide for installing and using StarryAI on macOS using an emulator, as StarryAI is a mobile app for iOS and Android, but with the help of an emulator, you can enjoy it on your Mac.
Step 1: Download and install an Android emulator
To use StarryAI on macOS, you will need an Android emulator, as there is no native version of the app for macOS.
An emulator allows you to run Android apps on your Mac.
The best emulator options for macOS
- BlueStacks (the most recommended option for its performance and ease of use).
- NoxPlayer (another option with a simple interface).
Installing BlueStacks
- Go to the official website of BlueStacks.
- Click the download for macOS button. (Currently, only BlueStacks 4 is available)
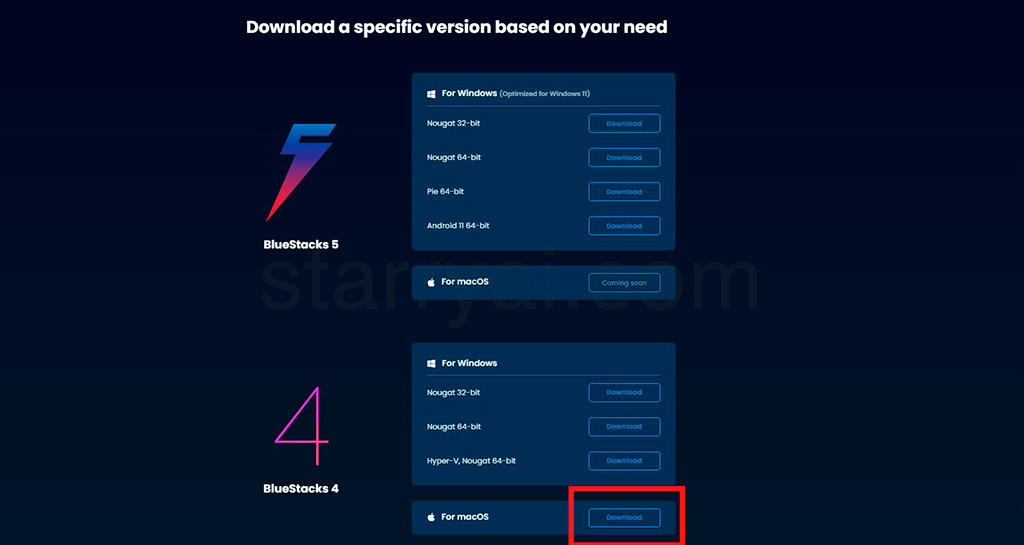
- Once the file has downloaded, open it and follow the instructions to install BlueStacks on your Mac.
- Accept the permissions requested during installation. You will find instructions to adjust security settings and allow the application to install correctly.
Step 2: Set up BlueStacks on your Mac
- After installing BlueStacks, open the emulator.
- When you open BlueStacks for the first time, you will be asked to sign in with a Google account. This is necessary because you will need to access Google Play Store to download StarryAI.
- Sign in using an existing Google account or create a new one if you do not have one.
Step 3: Download StarryAI from Google Play Store
- Once inside BlueStacks, open the Google Play Store app.
- Use the search bar and type "StarryAI".
- Click the Install button next to StarryAI in the search results.
- The App will download and install in BlueStacks as it would on a normal Android device.
Step 4: Run StarryAI in the emulator
- Once installed, you will see the StarryAI icon on the BlueStacks home screen. Click the icon to open the app.
- When you open StarryAI for the first time, you will need to sign up or sign in. You can do this using your email or sign in with your Google or Apple account.
- After signing in, you will be able to start generating images using the app directly from your Mac via the emulator.
Step 5: Customise and use StarryAI
- By using StarryAI from an emulator, you have access to all the App's features, just as you would on a mobile device.
- You can enter your textual descriptions to generate images, choose from the different artistic styles the app offers, and view the generated images on your Mac's screen.
- Using an emulator like BlueStacks also allows you to configure performance, adjust hotkeys, and even use your mouse and keyboard for more precise control during image creation.
Step 6: Export and save your images
- After creating your images with StarryAI, you can export them directly from the app. Within the emulator, save the images in the shared folders that BlueStacks offers to interact with your macOS system.
- To export the images to your Mac, go to the file tab within BlueStacks and select the generated images to move them to an accessible folder from your macOS system.
Step 7: Optimise the emulator's performance
If the emulator's performance is slow, you can adjust some settings in BlueStacks to optimise it:
- Allocate more RAM: In BlueStacks settings, you can increase the amount of RAM assigned to the emulator to improve performance.
- Enable virtualisation: Enable virtualisation from your Mac's preferences, which will allow BlueStacks to run more smoothly.
Efficient use of StarryAI on macOS with an emulator
Although StarryAI is designed for mobile platforms, using an emulator like BlueStacks on your Mac allows you to enjoy all its features. This option is ideal for those who prefer to work on a larger screen or integrate the generated images into their projects on macOS without the need to switch devices.
By following these steps, you will be able to install and use StarryAI on macOS, take advantage of its creative capabilities, and export your images directly from the emulator to your macOS file system.
- What does StarryAI offer?
- Downloading and installing StarryAI on iOS
- Premium features and their benefits
- Can I use StarryAI on a Mac?
-
Alternatives for using StarryAI on Mac
- Step 1: Download and install an Android emulator
- Step 2: Set up BlueStacks on your Mac
- Step 3: Download StarryAI from Google Play Store
- Step 4: Run StarryAI in the emulator
- Step 5: Customise and use StarryAI
- Step 6: Export and save your images
- Step 7: Optimise the emulator's performance
- Efficient use of StarryAI on macOS with an emulator